rip it down, paint it up
/This weekend was exhausting but also extremely fun. Saturday was filled with more demo and the start of painting.
I think we’re about done with the demo now!
Chris tore down + reframed the doorway into the bathroom from our bedroom.
There is only 1 bathroom in the house and it has 2 doors. One is in the little hallway, off the dining room and one is in the master bedroom. While it’s convenient having a door to the bathroom right in your bedroom, it also takes up a lot of wall space. It also makes the bathroom, not so private. A door is not as thick as a wall, if you know what I mean. ;)
So, down came the door and in went the studs!
We forgot about the nasty border that was up in the master bedroom. It’s never fun dealing with wallpaper. Ever. Right Angela? Luckily, this border wasn’t too hard to get off. I scraped and pulled as much as possible and then soaked it with hot water and scrubbed the rest off. We found a gross BRIGHT blue paint behind that needed a few extra coats of primer to cover up!
Ann + Kurtz were huge helps with the painting! We’re putting on two coats of primer on all of the walls, except 2 of the bedrooms that were white-ish in color. We’re doing 2 coats of primer because primer paint is cheaper than wall paint and to make sure none of that nasty yellow comes through the new color.
Do you see what’s happening in this photo?? My uncle was cutting the wall to make our opening! I was SO excited to see what it was going to look like all opened up.
Ann + Kurtz helped me rate the different kinds of paint. I’ll be posting about the paint we used with pros/cons/cost/etc. soon!
This screen painting method is the best! You just dump all of your paint into a large bucket and hand the screen off the side. Then you dip + roll the excess off the screen. It’s much easier than dealing this pans of paint and makes the painting process go more quickly.
1 coat of primer in the living room made such a difference!
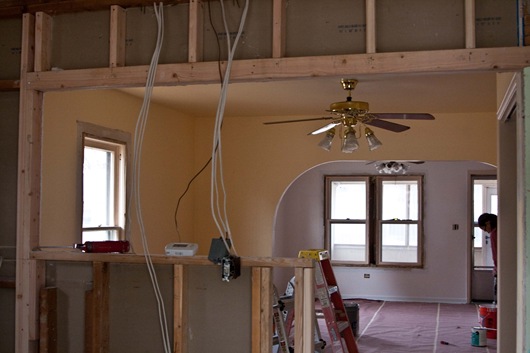
Do you see my lovely wall opening into the kitchen!!! It really opened the house up SO much. I am in love with it and couldn’t wipe the goofy grin off my face after my uncle removed the drywall.
I love it!!!
Chris also worked in the 3rd bedroom demo’ing the closet. We’re still keeping the closet, but we have to extend it out about 1’ to fit the stackable washer + dryer into it. We’re going to divide the closet in half, to keep one side as a real closet and the other for the w/d. Yes, this encroaches on valuable bedroom space, but there was no other option for the washer + dryer. If you remember before, they were in the kitchen. And that just isn’t going to fly.
We bought a new w/d, and are basically just flipping them on the other side of the wall. The bedroom closet wall, is on the other side of where the w/d are in this photo.

The bedroom is right off of the kitchen.
The boys were discussing countertop ideas.
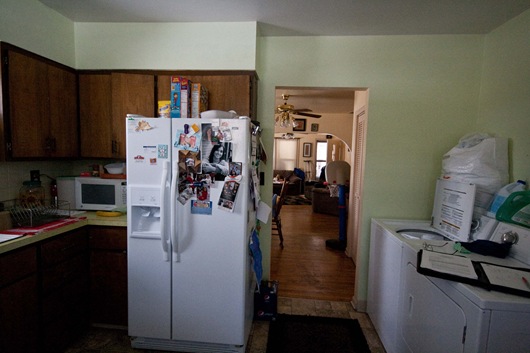
Do you remember what it used to look like facing this way??
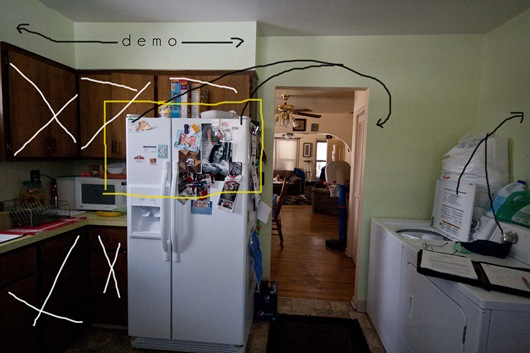
Check out the “before!!!” The yellow rectangle is now my lovely wall opening!

We took it easy this morning, but headed back to the house this afternoon to work on painting. The priming is coming along, but going slower than I thought. The ceilings were of course painted that nasty yellow, so we have to prime those + the baseboards as well.
A little roll action.
I’ll be back at the house tomorrow [Monday] painting away!
An electrician is coming Tuesday to get the kitchen all hooked up. Then, my uncle will help put up new drywall and we’ll continue with the painting. Things are moving right along!!
I’m pooped!
Bed.
Ashley


