Food Photography Tip of the Week |24|
5 Basic Tips for Food Photography
It’s been a few weeks since my last photo tip of the week post, but today I’m back with a few important things I’ve learned over the years. These are more general tips to hopefully set you in the right direction to start your food photography journey, or keep it moving forward.
1 // Collect inspiration and keep it in sight.
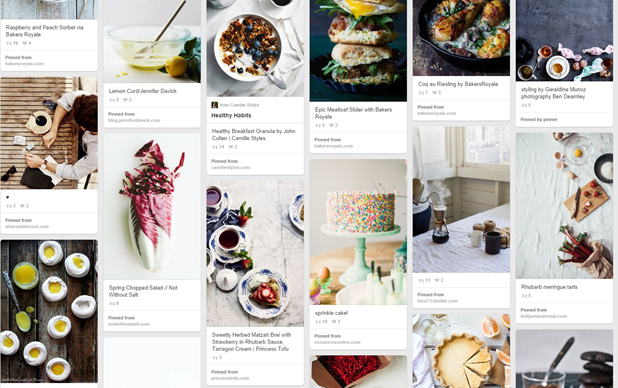
This is something that seems obvious. I’m sure you look at a million food photos online each day, but are you saving your favorites? Sure, pin boards are great, but I find printing photos or tearing them out of magazines to have in sight is much more helpful. You can keep them in a binder, tape them to your wall, or have a few in the kitchen with you for a specific shoot.
The idea isn’t to copy what you see in the photo but to use it as inspiration. Pinterest is a great place to start your collecting. From there, I’ll take a few photos into Photoshop, reduce them to fit on 1 page, print, and then take it in the kitchen with me. I find this to be very helpful and it’s fun to look at my final shots and compare them to the examples I printed.

2 // Turn your camera to manual mode.
You’ve probably heard me tell you to do this a few times by now, but I swear it will make the biggest difference in your knowledge of photography which will then help to improve your photos. Using your camera in manual mode will teach you how shutter speed, ISO, and aperture all work together to create a properly exposed image with just the right amount of focus and bokeh. Manual mode gives you full control over the settings, making you the decision maker and not your camera. While it may take you awhile to get the hang of it you’ll feel comfortable in no time. I don’t know the last time I switched my camera off of manual mode.
Also, when I use my tripod I even manually focus each shot. This ensures my photos are going to be as sharp as possible and the focus is set exactly where I want it.

3 // Practice when you have time to experiment.
It can be really hard to improve your photos when you’re only shooting for the next deadline, blog post, etc. I fall into this trap all of the time, but it’s important to practice your photography when you’re not working on an specific assignment. There’s always a bit of pressure when you’re on a deadline even if it’s for your personal blog. It can be hard to master a pour shot or capture steam in your photos when you have a tiny window to get it right. My suggestion is to set up a time each week to practice, even if it’s only for 30 minutes.
Maybe you know you always have a hard time photographing something specific, like winter squash. If you practice shooting squash for 30 minutes you will notice more creativity coming out as you continue to snap away. This is something I need to do more of myself!
[Curious how to cook acorn squash? Check my tutorial here with a few simple preparation methods!]

4 // Start with a simple collection of props.
I know we’ve talked about props a few times before, but you really don’t need much to get started. Here is an idea of some basics that are great to have on hand. Besides thrifting, another money-saving option is to ask family and friends if they have any kitchen items you can borrow or keep if they’re no longer using them. You can cook up something delicious to say thanks!
When I started, many of the items I used were what I already had in my cupboards. I definitely had to keep things on the cheap the first few years.
The wood planks below were given to me from a friend. They were part of an old fence that was taken down and when I saw the planks I asked/begged if I could have a few. This has turned into one of my favorite surfaces to shoot on.
[pssst! Check out my recipe for Simple Vegan Tacos on Craftsy!]

5 // Create your own style.
Use other peoples’ photos for inspiration but let your eyes guide you behind the camera. Trust yourself and be confident with the work you produce. Try new things to find your groove and don’t get discouraged when something doesn’t work. [Easier said than done!] You’ll find your weaknesses and strengths as you continue to take more photos, and you’ll also find a style that feels comfortable. If people can pick your photos from a lineup you know you’re developing your own style.

And a 6th, unofficial tip – don’t forget to have fun! If you’re feeling stressed, take a breather and then get back at it.
Ashley


