this week in doughnuts | {giveaway!}

photo 1

1. Peach upside-down doughnuts do not release from the pan.  However, peach stuffed doughnuts do.

photo (1)

2. Jelly filled baked doughnuts WORK!!!!!!!!!

photo 2

photo 3

3. These gluten free graham crackers are pretty tasty.  I still need to make my own GF recipe…maybe in 2013.

photo 4

photo 5

photo 1(2)

4. Only the best eggs for these doughnuts!

photo 2(1)

5. Half of the doughnuts from one day.

photo 1(1)

6. All of the doughnuts from that same day.

photo 4(1)

7. A breakfast doughnut filled with blueberries and finished with a broiled crumb topping.

photo 2(2)

8. The mess I’ve come to know so well.

photo 3(1)

8. Quite possibly my best doughnut ever is in the photo below.

Strawberry Lemon Cheesecake!

When 2 college boys enthusiastically tell you these are the best doughnuts they have ever tasted [ever!] it will make your day…or week.

photo 5(1)

9. I promise to share an actual recipe next week.  Things have been a little, well, hectic. 

photo 4(2)

10. I found this set of plates a few weeks ago at CB2.  I could NOT pass them up.  I mean, how perfect are they???  I kind of love the “moldy donuts” plate the most.

photo 3(2)

Instead of buying one set of these adorable plates I bought TWO. One for me and one for YOU!

GIVEAWAY!

I know a lot of you have been asking about a doughnut giveaway but they are extremely expensive to ship as they have to go overnight.  They also have to be sent without any frosting or toppings which is no fun at all.  So, in lieu of sending doughnuts I’m going to send one of you these three plates!!  [each plate is about 5x5 in size]

To enter:  Leave a comment telling me any of following things:

  • what your plans are this weekend I have a wedding rehearsal + dinner photo shoot on Saturday.  The rest of the weekend I will be working on the book!
  • that you’re not sick of hearing me talk about doughnuts yetYou have no idea how many I ate this week.
  • your dream doughnut flavor – My brain is spent on coming up with flavors!  My lists is over 101!
  • the #1 place you want to travel to I can never, ever decide on a #1!  We’re actually headed to Costa Rica in a week for our good friends’ wedding.  I’ll be photographing it!

Giveaway ends Sunday, Sept 2nd at midnight EST.  US entries only [sorry!].

Have a fabulous long weekend!

Ashley

pssst! Just finished up the edits from my first wedding photo shoot.  You can check them out on my photography blog!

happy birthday to chris + an art project

Time seems to be flying by and the past few years have been quite the whirlwind.  A whirlwind of ups and downs, excitement, stress, sadness, and joy.  Experiences that I am so fortunate to have shared with Chris.  Experiences that I wouldn’t have been able to get through without Chris.

To mark Chris’s 29th year I wanted to come up with something extra creative + meaningful while trying not to break the bank. This idea popped into my head a few months back and I’m so excited to have finally completed it.

Because I have the patience of a 4yr old when it comes to giving gifts, I had to give this to Chris on his birthday-eve.  By the looks of the package he expecting a framed photo or some sort of artwork but was quite surprised at what was actually inside.

This gift documents the exact route we took on our honeymoon in Ireland just over 4 years ago.  There was no way I was driving on the opposite side of the road while trying to work a manual car with my left hand.  Chris drove the entire 10 days which I am so thankful for.  If the driving would have been on me, we would have never left Dublin.

You can read more about our trip in this postPlease excuse my use of “LOL” and approximately 1 million exclamation points.

Here is the step-by-step process:

1. Find a map and buy it.  I found mine on this Etsy site.  It was printed in 1892! $32 with s/h

Ireland Map Route - Edible Perspective-2

2. Buy a can of “preserve it” and “spray adhesive.”

note:  Since you can’t cover the map and pins with glass I wanted to make sure the map doesn’t deteriorate over time.  I grabbed this bottle of “preserve it” from Michaels with a 40% off coupon putting it around $4.  I already had the adhesive spray.

Ireland Map Route - Edible Perspective-15

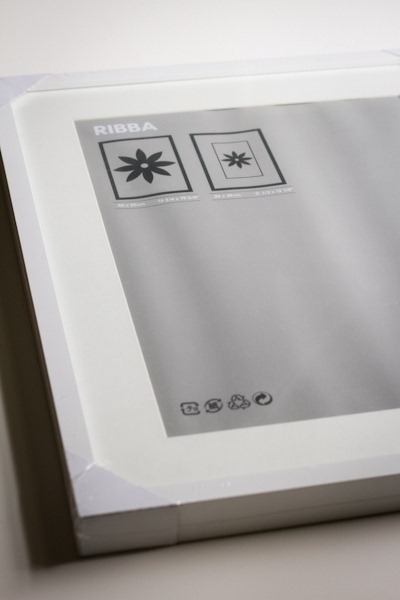
3. Buy a frame that is the proper size for your map.  I got this 16x20 frame at IKEA a few months ago.  It was waiting to be used!  $15

4. Buy a piece of foam board that you can cut down to fit in your frame.  Had an extra piece at home!  $0

5. Buy a piece of smooth art-board [mine was Canson brand] that you can trim down to the size you need.  This should be thick and sturdy, similar to matte board.  $2.39 after another 40% off coupon

Ireland Map Route - Edible Perspective

6.  Cut the art board and foam board and make sure they fit snugly into your frame.

note: An x-acto knife and a metal straight edge work really well.

Ireland Map Route - Edible Perspective-3

7. Flatten the map under a stack of heavy books.

Ireland Map Route - Edible Perspective-4

8. Lose patience while waiting for the map to flatten and center the map, marking lightly with a pencil so you know where to glue it down.

Ireland Map Route - Edible Perspective-5

9.  Spray the back of the map according to the directions on your spray adhesive can.  This is the trickiest part as once you’ve started to place it you can’t really pick it back up!  Have a straight edge around can help to smooth out any bubbles.

10.  Once dry spray with the “preserve it” according to the product directions.  Let fully dry.

notes: In steps 9+10 it’s best to do the spraying outside.

Ireland Map Route - Edible Perspective-6

11.  Place the matte board in the frame, then the board with the map on it, and then the foam board in back.  Secure the tabs in the back of the frame.

Ireland Map Route - Edible Perspective-7

12.  Start adding your mini T-pins [found in the sewing section at Michaels] wherever you like.  $2.99

note: I added one in each corner to look as if they are holding the map in.  Make sure you’re working on a flat and sturdy table.  Press each pin in firmly and tap lightly with the bottom of a screwdriver or a small hammer, etc. to make sure the T-pin goes all the way through to the foam board.  A few light taps are all you need.  The pins should feel very secure if they’re in all the way.

13.  Double knot whatever type of string/rope/twine you’re using at the first T-pin to start mapping your route.  $3.99

note: I used very thin hemp rope, also from Michaels.  It came with a few different bright colors.  I started with green but changed to blue because it stood out a lot more.

Ireland Map Route - Edible Perspective-8

14.  Trace your route with the string tying a single knot at each T-pin.  Make sure to pull the string as tight as possible before securing the knot.

Ireland Map Route - Edible Perspective-9

15.  Double knot at your end point, trim the string at the start and end, and you’re done!

Ireland Map Route - Edible Perspective-10

Ireland Map Route - Edible Perspective-11

Ireland Map Route - Edible Perspective-12

Ireland Map Route - Edible Perspective-13

Oooh – don’t forget to carefully wrap it up! 

Total cost = $60

Ireland Map Route - Edible Perspective-14

Happy Birthday, Chris!!

Here’s to the next whirlwind of a year.  There’s no one else I would rather experience it with.

Love you so much!

Ashley