quick stuffed mushrooms + snow

We hit the road bright and early at 5:30am this morning, headed for Winter Park ski resort.  It’s just over a 2 hour drive, but leaving much after 5:30 would have us sitting in traffic for an extra hour.

2 of 20.jpg

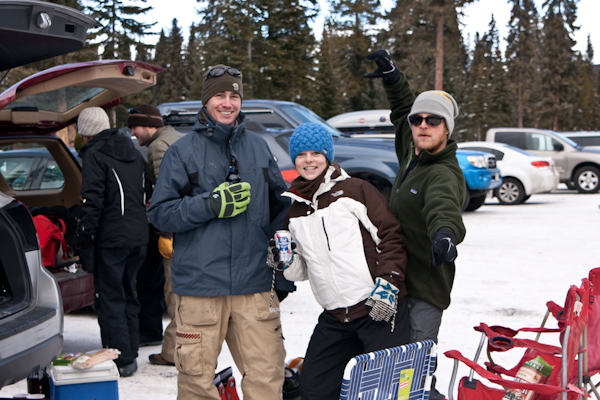
The conditions today were warm + sunny, with no new snow.  We got in a few good runs, but were most excited for the 2nd half of the day.  In the parking lot!  The perfect conditions for a beach day.

aka: grilling out in the parking lot, slope side

3 of 20.jpg

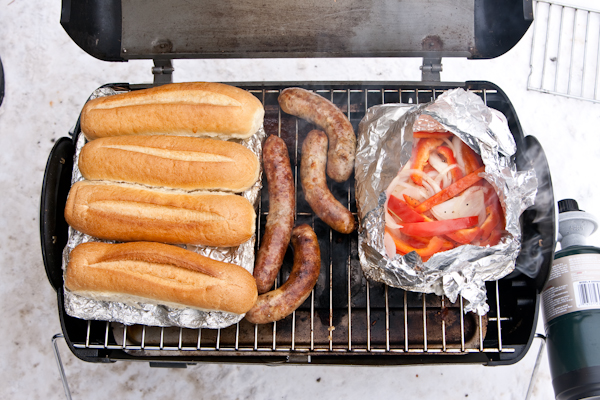
We prepped the food the night before, and wrapped everything up in foil, so it was ready for the grill.

A few of our Denver friends were there as well!

Ali + Hovan [getting hitched this June]

5 of 20.jpg

Like a snowy tailgate party.

6 of 20.jpg

The husband with Ali + Hovan.

7 of 20.jpg

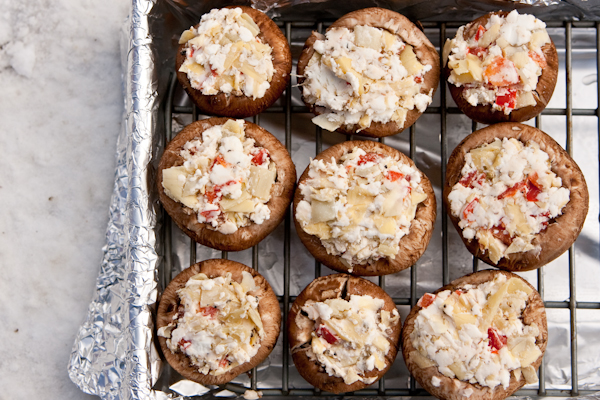
My stuffed mushrooms, pre-grill.

Saturday night, I made an extremely easy + mouth watering filling, for these cute baby bellas. 

mush1.jpg

I know that my recipes can sometimes use weird ingredients, or be a process to make, but not today!

This is a perfect mushroom filling, but could also be used to stuff or top many other things.

  • broiled on top of a pasta bake
  • warmed on top of roasted or sautéed veggies
  • sandwich topping
  • pepper stuffing
  • salad topping
  • veggie spread
  • etc.

Goat Cheese Stuffed Mushrooms

  • ~15 baby portabellas
  • 4oz plain goat cheese [or feta]
  • 2 whole artichokes, diced
  • 1/3 cup red pepper, diced
  • 1 teaspoon dried oregano
  • 1/4 teaspoon garlic powder
  • 1/4 teaspoon salt
  • black pepper
  1. Preheat oven or grill to 375* and lightly grease a pan or grill grates.
  2. Gently clean the mushrooms with a damp paper towel, remove the stem and peel away the fringe around the edge to allow more room for stuffing.
  3. With a fork, mix together all remaining ingredients.  I used an ample amount of black pepper.
  4. Stuff into about 15 baby mushrooms.
  5. Grill or bake until hot and mushroom is slightly tender.  5-10min, depending on grill or oven.  Avoid overcooking, as the mushroom will become soggy.

These were a hit! 

Ahh, simplicity.

8 of 20.jpg

Ann [in the cream hat] + Kurtz next to her, were our other Denver friends that came out to play.  Also getting hitched in 2012!

9 of 20.jpg

Other grilled foods.

10 of 20.jpg

Grill baked potatoes are delicious.

  • 4 medium russet potatoes
  • 2-3 Tablespoons oil
  • 1 Tablespoon garlic, minced
  • 1.5-2 Tablespoons rosemary, finely chopped
  • 1.5 teaspoons dried oregano
  • 1-1.5 teaspoons salt
  • black pepper
  1. Wash well, slice potatoes in half, and then cut very thin slices.
  2. Mix with all other ingredients.
  3. Wrap in foil [for the grill] or place on a baking sheet and cook for 25-35min at 400*, turning a few times if using a pan.
  4. Done with tender or wait longer to let crisp!
11 of 20.jpg

Great day at the “beach!”

12 of 20.jpg

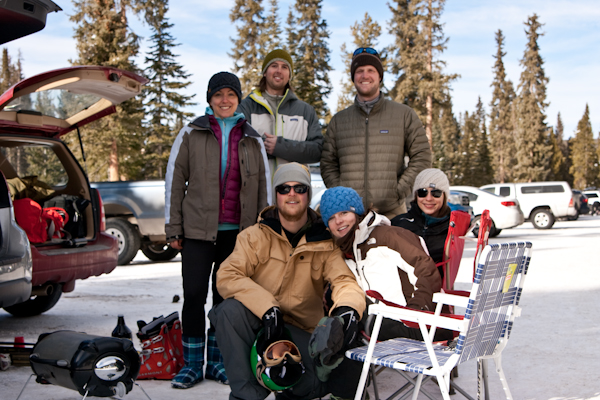
All together now.

13 of 20.jpg

Switched with Chris!

14 of 20.jpg

Got one with everyone!

15 of 20.jpg

Off to enjoy the last few minutes of Sunday, until my head hits the pillow.  Still battling some sort of week-long cold! 

Ashley

workouts + eggs

Sometime in November, I started talking your ear off about my workouts, trying to plan a new approach.  We ended our gym memberships, I was just getting over a foot injury, and the winter weather was upon us.  I weighed my options on which program to try and decided to tackle Jamie Eason’s LiveFit 12 week program.  And then, I didn’t update you again.  As I’m sure you’ve lost sleep over not know about my workouts.  But at least I have been keeping up with the photography posts!!  Can I possibly link to 1 more thing in my first paragraph?

After ruling out many of the programs for either being too high intensity for my foot, or being videos that I have to watch on the TV, or for cost, Jamie’s program seemed like the best option.  I was also ready for a strength training program and gaining more muscle.

I’m 6 weeks into the program and here are my thoughts so far.  I hope you’re ready for it.  If not, there is a recipe at the end, which you can feel free to skip down to.

Plus, as an added bonus, you get to meet my TWO personal trainers.  Their energy is contagious.

*Please note:  I am not a doctor.  I am not a trained expert.  I’m just someone who incorporates workouts into my everyday life and likes to share my experiences along the way.  The following information is not a guide I am suggesting anyone follows.  Always talk to your doctor before changing up your workout routine or diet.

dog1.jpg

My Goals:

  1. avoid boredom and falling into a cardio-only workout plan [easy to do with no gym membership and a bike trainer at home]
  2. gain muscle + strength
  3. gain muscle definition in legs
  4. strengthen back + core
  5. leaner all around look, whether that means going + or – on the scale

Starting place:

While I would have loved to take week 1 photos + measurements, I didn’t.  I keep saying I’m going to take photos and then it doesn’t happen.  I tried to take self photos and it didn’t work at all, since we don’t have a full length mirror.  The only thing I do know is my starting weight, which really isn’t a good indicator of much at all.  Since muscle weighs more than fat, seeing a jump on the scale could mean I’m just gaining muscle or even retaining water.  Getting my body fat measured or measuring my waist/hips/arms/legs/etc. would have been more helpful to track progress.

I’m sharing my weight, only to show you how much it can fluctuate from week to week and to say that every body type is different.  I know a lot of people that are my height [5’4”] with a comfortable, easy-to-maintain weight at 120lbs +/-.  I try not to compare.  My easily maintainable, healthy weight, is right around 130lbs.  If I tried to lose 10lbs, not only would it be almost impossible, I would be miserable trying.  While my upper body is naturally lean, my lower body holds more weight and takes much longer to see any changes in definition/tone.

dog2.jpg
  • starting weight:  131lbs
  • after week 1: 134.5lbs
  • after week 5: 133.5lbs

I have no goal weight in mind but would have liked to see the difference in my body fat, since I haven’t done a true strength training program in quite some time.

1. My basic plan – This 12 week program outlines exactly what to do everyday for 12 weeks, including what to eat.  While that may be the right path for some, I don’t like to follow such a rigid food plan.  It just doesn’t work for me.  Not because I couldn’t follow the eating plan, but because I don’t want to.

dog3.jpg
  • I planned to do each of the workouts specified for all phases of the program, sometimes adding to them.  ie: walking the dogs, or working abs
  • I planned to very loosely follow the idea of the food plan.  Basically, I was going to focus on adding more protein in my diet to help my body recover from the strength training.  Also, I planned to cut back slightly on carbs.  Even on a gluten free diet, I eat loads of carbs.  Typically around 1.5-2 servings per meal.  My goal was to keep breakfast high carb + high protein, but cut back to 1 serving of carbs at both lunch and dinner, for foods like rice/quinoa/millet/etc.  So, instead of 1.5c of rice for dinner, scaling it back to only 1c.  However, I personally never measure my food, but just eyeball it.

[Look at that face!!!]

dog5.jpg

2.  Phase 2

The Workouts

  • Phase 1 lasted for 4 week, which focused on building muscle.  In the first two weeks you have 4 days of lifting + 3 days of rest and in the second two weeks you have 5 days of lifting + 2 days of rest.
  • This phase was b-o-r-i-n-g for me!  After getting used to the fast paced Body Rock workouts, these were a snooze fest.  I realize they are completely different than the Body Rock workouts, but I wasn’t ready for how slow they would go.  Lift 1 set, wait one minute, lift another set, etc.
  • As part of my daily routine, I walk the dogs for about 25-30 minutes each.  It’s pretty flat in Ft. Collins, and no power walking is involved.  I don’t really consider this cardio, but just light + easy exercise, necessary for happy dogs.
  • I also added about 2 days of ab workouts, which before this program, I was doing every other day.  Just a few moves like plank, side plank, etc.
  • 1 day a week, I would swim for about 40 minutes, to keep up my swimming endurance which has been going for about 1.5 years now!

The Food

  • While this program suggests the eating every 2-3hr idea, over the years, I have found that is not best for my body.  I have a hard time not overeating when I do this.  With the 3 smaller main meals and 2-3 snacks, I am never left with that satisfied, full feeling.  This always leaves me to question, “am I hungry right now,” “is it time for a snack,” “what time can I eat my next snack,” etc.  Eating this way makes me constantly think about food.  And believe it or not, I don’t want to constantly be thinking about food!  However, I know this way of eating works well for a lot of people.  To each their own!
  • What I’ve found works best for me, is eating 3 meals that leave me full [approximated around 500-600 calories], consuming protein after working out [almond milk + protein powder, or 1/2 banana + protein powder + splash of milk], plus eating a few small snacks throughout the day as needed, ie: clementines, walnuts/almonds, stove popped popcorn, dark chocolate, mandel bread, etc.  I do not have a daily goal or tally of how many calories I’ve consumed, but I never go to bed hungry!
  • Getting in more vegetarian protein, not high in carbs, can sometimes be challenging.  Beans are full of carbs, and I’m not trying to chow down on soy on a daily basis.  Because of this I’ve been eating more egg whites than I’d like to admit.  I still eat 2-3 whole eggs almost every day, but didn’t want to up that to 4-6 whole eggs a day.  I’ve also been eating about 1-1.5 servings of Raw Protein each day.  I hit a great sale a few months back and had $5 coupons, which allowed me to stock up on my favorite powder.  I used to be kind of hesitant about protein powder, until I found this one, packed with raw/sprouted/nutrient dense ingredients.  I also love that it does not include stevia, which I despise the taste of.  Real sweeteners [honey/maple syrup/brown rice syrup/sucanat/fruit] all the way!  *Edited to add*  I eat about 1 serving of beans everyday [sometimes more] and about 2-3 servings of soy [tempeh, sprouted organic tofu] per week.

Overall:  I realize the first phase was to build you up for phase two and was meant to start slowly.  However, I felt like I had a solid base and needed a bit more added than what was suggested, which is why I chose to add small amounts or cardio + ab workouts.  While the workouts were boring, they left my muscles fatigued + burning after each workout.  I was sore [but not overly so] the day after each workout.  It took a few weeks to figure out how much protein was the right amount to add, and how much extra fuel my body needed with the new weight lifting.  I made sure to still enjoy my food, creating the same healthy + tasty meals, per usual.  I felt great getting back into strength training and started to notice a difference in my overall body tone after week 3.  The workouts are fairly difficult to complete at home, with no bench, barbell, or machines.  However, I’ve gotten pretty good at modifying the moves and Googling for ideas.  At home, we have dumbbells, a stability ball, and a pull up bar.

And now…a recipe.

Finally!

eggs1.jpg

This recipe is hopefully one of many protein-focused recipes to come in the near future.  And believe it or not, they don’t really have anything to do with my new workout plan.

A few months ago, a good friend of mine mentioned she was struggling with not having energy in the morning.  While sleep was not the issue, she thought it was her breakfast.  She was in a breakfast rut of the infamous bagel + peanut butter and looking for something less processed, less carb dense, and higher in protein and healthy fats.  A breakfast to leave her with more energy and better satiation.

Enter eggs, cottage cheese, and greens.

I recently saw a recipe on 101 Cookbooks for eggs combined with cream cheese and wondered if cottage cheese could successfully be cooked into eggs.

While the texture of cottage cheese might not be your favorite, it actually melts into the eggs while cooking and is barely detectable.  With 2 eggs and about 1/4-1/3c of cottage cheese, you’re looking at approximately 20g of protein.  Adding greens to your breakfast may seem a bit gag-inducing at first, but they will definitely get your morning started in the right direction.

eggs3.jpg

Cottage Cheese Scrambled Eggs

  • 2 large eggs
  • 1/4-1/3 cup 2% cottage cheese
  • dried herbs [a few pinches]
  • salt + pepper
  • 1- 2 teaspoons coconut oil [for cooking]
  1. Heat a pan over medium and add oil to the pan.
  2. Squeeze excess moisture out of the cottage cheese with a paper towel, then place the cottage cheese in a bowl.
  3. Whisk in the eggs
  4. Whisk in herbs. [I like to use oregano, thyme, and garlic]
  5. Cook for about 5-7 minutes, stirring the pan every minute or so.  Make sure to let these cook longer than typical scrambled eggs, so the extra moisture from the cottage cheese cooks off.  These take about double the amount of time to cook.
  6. Add salt + pepper to taste.
  7. Wrap in washed + dried chard leaf if desired.

Pair these egg wraps with toast + nut butter, fruit + nutt butter, a peanut butter banana green smoothie, or small bowl of oats/oat bran.  The eggs + greens are definitely not enough for me in the morning!

eggs4.jpg

After phase 2 is complete, another post will follow.  That is, if you actually want to read more!

Ashley