Honey Dipped Doughnut Waffles

Apologies if you experienced any shenanigans with the blog yesterday.  It seems to have been down for awhile.  Squarespace got it back up and running overnight, which I was so happy to see this morning.

Enough about blog-things.

The most amazingly, spectacular kitchen-thing happened yesterday!

untitled-2032.jpg

You are all aware of my current waffle obsession, correct?  It's getting bad.  I can't tell you the last time I've had something other than a waffle for breakfast.  It's been months.  They're just so easy...and delicious...and...well, delicious.

I know many of you do not own waffle irons and I totally get it.  It's just one more clunky kitchen appliance to have around and they obviously are not free.

untitled-2034.jpg

Well, I think it is time that the waffle iron gets put at the top of your, "next kitchen appliance list."  [I know you have one!]  Check garage sales, thrift stores, and Craigslist for deals!  Because, not only can you make everyday waffles, savory waffles, and cornbread waffles, but now you can also make DOUGHNUT WAFFLES.

Yes.

Doughnut--freaking--waffles.

What the heck does that even mean?  They look like waffles, not doughnuts.

It means:

You can make a recipe for baked doughnuts [like the 101+ that will be in my book in October!! shameless plug!] and pour the batter into your waffle iron instead of baking them in your oven in a doughnut pan.

!!!!

untitled-2040.jpg

This is about as exciting as when I turned pancake batter into CAKE.  

untitled-2054.jpg

I swear I am not hopped up on coffee + waffles right now....

untitled-2060.jpg

So what is this drippy goodness that is glistening all over these hybrid beauties?  

HONEY.

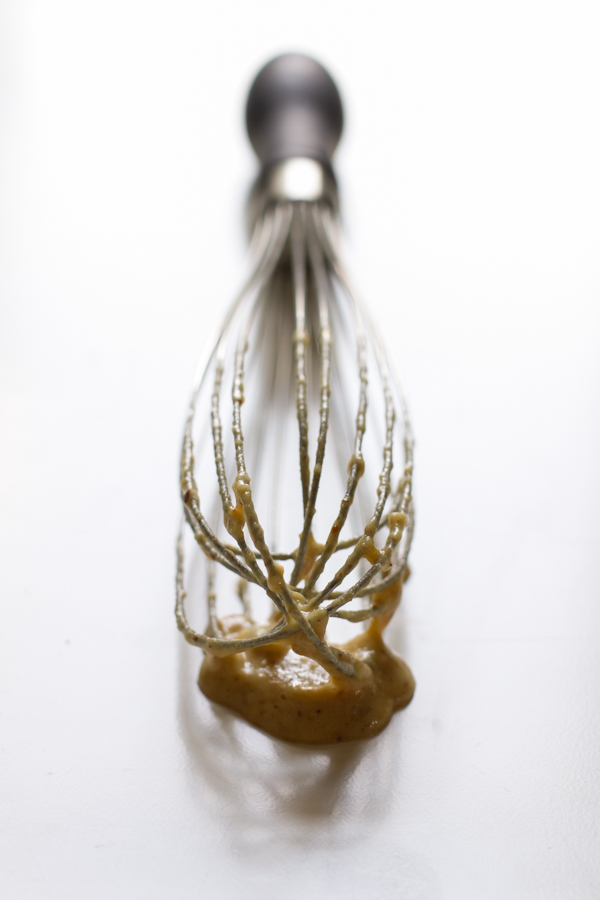
Boiled honey.  Which happens to be much, much easier to dip things into than non-boiled honey.  It soaks into the doughnut-waffle without making it soggy and creates a slightly less sticky mess.  

untitled-2061.jpg

Sweet but not overly so.  Breakfast or dessert.  Full-size waffles or minis.  Whichever you prefer.

It was probably one week after I was thinking about this idea--because I can't stop thinking about waffle creations--that I saw Sweet Treats try it out with success.  That's when I knew I had to put it to the test with some of my recipes.  Her waffles turned out way more adorable than mine, but I still love the idea to make mini waffles instead of full-size.  But they will work at any size you like!

untitled-2066.jpg

This recipe is actually straight from my book, Baked Doughnuts For Everyone.  The only change was not adding quite as much milk, because I was after a slightly thicker batter.  I couldn't believe how similar these were in texture to the doughnuts and each batch only took about 3-4 minutes to cook! 

Although, I guess you do have to cook a few batches, so it probably takes almost the same amount of time.  But on the bonus side you won't have a doughnut pan to clean afterwards.

untitled-2074.jpg

Print this!

Honey Dipped Doughnut Waffles

gluten-free // yields 12-14, 3-inch Belgian waffles

  • 1/2 cup gluten-free oat flour, or gluten-free all purpose blend
  • 1/2 cup sweet rice flour
  • 3 tablespoons almond meal
  • 2 tablespoons sucanat, or coconut sugar/pure cane sugar
  • 1 teaspoon baking powder
  • ½ teaspoon salt
  • 2 large eggs
  • 1/4 cup unsweetened almond milk, or 2%
  • 1/4 cup unsweetened applesauce
  • 1/2 cup + 3 tablespoons honey, divided
  • 2 tablespoons safflower oil, or other cooking oil
  • 1 teaspoon vanilla extract
  1. Preheat your waffle iron to medium heat.  Grease if needed.
  2. Place the oat flour, sweet rice flour, almond meal, sucanat, baking powder, and salt in a large bowl mixing until well combined.
  3. In another bowl, whisk the eggs together, then whisk in the milk, applesauce, 3 tablespoons honey, oil, and vanilla extract. 
  4. Pour the wet mixture into the dry ingredients and whisk together until just combined [stop when you no longer see dry flour.]
  5. Let the batter rest for 5-8 minutes undisturbed.
  6. Spoon small amounts of batter into your waffle iron for mini waffles.  For my 7-inch Belgian waffle maker I made about 3 mini waffles at a time to prevent them from touching.
  7. Cook according to your waffle iron manual.  Mine were perfect after 1 cycle over medium.  Soft + fluffy with a cakey center.
  8. Set your waffles on a cooling rack as they finish cooking.
  9. Then, in a small pot over medium-low heat bring the honey to a low boil, whisking occasionally. 
  10. Turn off the heat and pour in a shallow bowl just large enough to dip the waffles. 
  11. Using caution [honey will be very hot!] dip the top of the waffle in the honey and let the excess drip off.  
  12. Place on a cooling rack for 1-2 minutes [so you don't burn your mouth!] before serving.  

notes:  If you want to serve your waffles hot keep you oven at 200* F and place the waffles on a baking sheet in your oven as they finish cooking.  Remove from the oven and dip into the boiled honey.  Waffles are great served warm or at room temp.  Waffles can be made full-size or mini.  Avoid a high heat setting as the outside will brown before the inside is finished cooking.  Any type of waffle maker should work to make these.  There are no perfect substitutions for sweet rice flour or almond meal.

untitled-2090.jpg

So fluffy and soft.  And doughnutty.  And waffly.  

Doughnut Waffles.  This is now a thing.

Ashley

maple sea salt doughnuts

I made a huge mistake.

While I don't really follow or keep up with the "it's xyz national food day," I feel like National Doughnut Day should have been on my calender.

It came + went this past Friday and I completely missed it.  

How could this possibly have happened??  And it was the husband who let me know!  

untitled-1498-2.jpg

I'm blaming it on my breakfast Friday excitement.  Doughnuts were not even on my radar!

untitled-1508.jpg

I'm hoping that this recipe makes up for it.

And I'm hoping you are as in love with the maple + sea salt combination as I am. 

untitled-1510-2.jpg

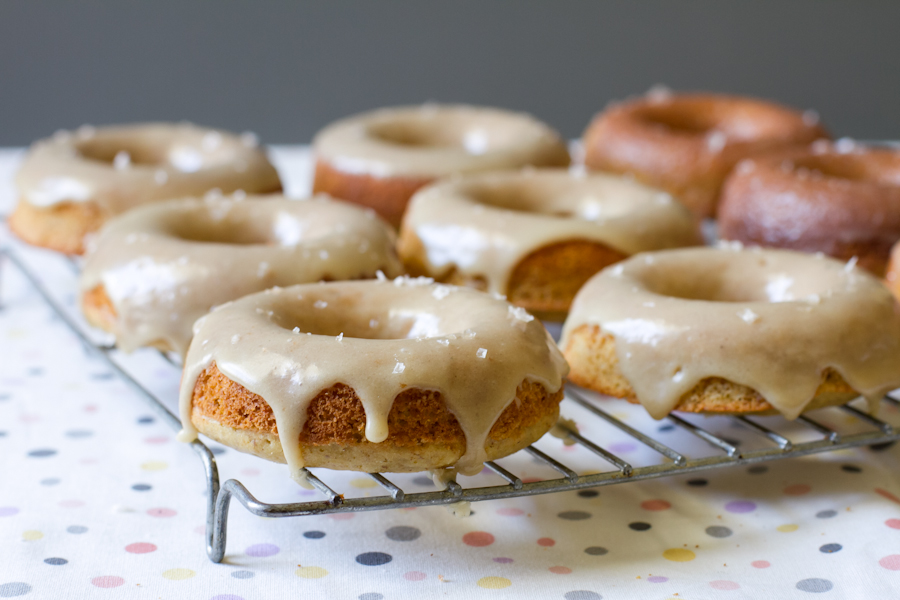
The doughnuts are infused with pure maple syrup and a hint of cinnamon.  They're coated with a maple glaze + a pinch of sea salt on top.  If you're worried about the texture being too muffin-like or cake-like you can set your worries aside.  These have a very unique cake-doughnut like texture that you will surely love.  

Don't have a doughnut pan?  Feel free to bake these in a muffin pan with liners.  The texture won't change a bit!

Simple + so very satisfying.

untitled-1527-2.jpg

This is by far one of the most popular doughnuts in the book!  This is coming straight from the mouths of my lovely taste-testing crowd.  I actually made a private doughnut group on facebook for friends + family in the area.  I used it to update everyone what doughnuts would be available for pickup that day and at what time.  Everyone showed up around 5pm with empty tupperware containers ready to fill up.  It worked out quite perfectly.  

untitled-1529.jpg

I like the looks of the thick glaze but prefer to eat the thinly glazed version.  Either way they're quite delicious and you always have the option of making some of each!

untitled-1533-2.jpg
untitled-1537-2.jpg

Print this!

Maple Sea Salt Doughnuts

gluten-free, dairy free, vegan option // yields 8-10 doughnuts

using a Wilton pan

from:

Baked Doughnuts For Everyone

 [Oct. 1st, 2013 publication date]

For the doughnuts:

  • 1/2 cup gluten-free oat flour
  • 1/2 cup sweet rice flour
  • 3 tablespoons almond meal
  • 2 tablespoons pure cane sugar
  • 1 teaspoon baking powder
  • 1/2 teaspoon salt
  • 1/4 teaspoon cinnamon
  • 2 large eggs
  • 1/3 cup unsweetened almond milk
  • 1/4 cup unsweetened applesauce
  • 3 1/2 tablespoons pure maple syrup
  • 2 tablespoons coconut oil, melted + slightly cooled
  • 2 teaspoons vanilla extract
  • large flaked sea salt, topping

For the glaze:

  • 1 cup powdered sugar
  • 1/4 cup maple syrup
  • 1 to 3 teaspoons unsweetened almond milk
  1. Preheat your oven to 350°F and grease your doughnut pan.
  2. Combine the oat flour, sweet rice flour, almond meal, cane sugar, baking powder, salt, and cinnamon in a large bowl, mixing until well combined.
  3. In another bowl, whisk the eggs together, then add the milk, applesauce, maple syrup, oil, and vanilla extract. Whisk until well combined.
  4. Pour the wet mixture into the dry ingredients and stir with a large wooden spoon until just combined, being careful not to overmix (stop when you no longer see dry flour).
  5. Spoon the batter into the doughnut molds filling to just below the top of each mold, 1/8” to 1/4” from the top.
  6. Bake for 18 to 22 minutes, until lightly golden brown around the edges. A toothpick inserted in the center should come out clean. 
  7. Let cool in the pan for 5 minutes. Slide a thin spatula around the edges of the doughnuts to help loosen them out, then place on a cooling rack and allow to cool fully before topping.
  8. Stir the glaze ingredients together with a fork until fully combined. Add more milk if a thinner consistency is desired.
  9. Invert the doughnut into the glaze letting the excess drip off, or drizzle the glaze over the doughnut. 
  10. Top with a sprinkle of sea salt and let set until hardened.

notes/subs:  Sub [non-gmo] sunflower, safflower, or canola oil instead of the coconut oil if desired.  Sub 2% milk or unsweetened soy milk for the almond milk if desired.  I do not recommend subbing the almond meal or sweet rice flour for any other flours.  If you are unable to tolerate oat flour sub in a high-quality gluten-free all purpose blend for the oat flour only.

For a vegan version:[tested + included in the book]

  • 1/2 cup gluten-free oat flour
  • 1/2 cup sweet rice flour
  • 3 tablespoons vegan cane sugar
  • 2 tablespoons almond meal
  • 2 tablespoons coconut flour
  • 2 tablespoons ground flax meal
  • 1 teaspoon baking powder
  • 1/2 teaspoon baking soda
  • 1/2 teaspoon salt
  • 1/4 teaspoon cinnamon
  • 1/2 cup unsweetened almond milk
  • 1/4 cup unsweetened applesauce
  • 3 tablespoons oil
  • 2 1/2 tablespoons pure maple syrup
  • 2 teaspoons vanilla extract
  1. Follow instruction 1 - 4 above mixing dry ingredients together from the oat flour to the cinnamon and whisking wet ingredients in a seperate bowl from the milk to the vanilla.  
  2. Let the batter sit undisturbed for 5 minutes.  The mixture will be very thick + not pourable.
  3. Spoon into the doughnut molds and lightly even out the tops, or spoon into a gallon sized sealable bag, squeeze the air out + seal, cut a 1/4-inch piece from one bottom corner, and gently pipe the batter into the molds.
  4. Follow instructions 6-10 to finish the doughnuts.
untitled-1548.jpg

My sincerest apologies for missing National Doughnut Day.  I hope you can find it in your hearts to forgive me!

Ashley